
Gardening is a fun and relaxing hobby. It can be enjoyed by anyone. An elevated garden bed is a great way to grow plants. It is easy to build. This guide will help you create your own elevated garden bed.
Why Choose an Elevated Garden Bed?
There are many reasons to build an elevated garden bed. Here are a few:
- Easy to reach plants
- Better drainage
- Less bending over
- Good for small spaces
- Helps keep pests away
What You Need
Before you start building, gather your materials. Here is a list of what you will need:
- Wood (like cedar or pine)
- Screws or nails
- Drill or hammer
- Measuring tape
- Level
- Soil
- Plants or seeds
Step 1: Choose the Right Location
Find a good spot for your garden bed. Look for a place with:
- Plenty of sunlight
- Easy access to water
- Good drainage
A sunny area is best for most plants. Make sure the spot is flat.
Step 2: Plan Your Design
Decide how big you want your garden bed. Common sizes are:
- 4 feet by 4 feet
- 4 feet by 8 feet
- 2 feet by 6 feet
Choose a height that works for you. Most beds are 1 to 2 feet high.
Step 3: Gather Your Materials
Now that you have a plan, get your materials. You can buy wood at a store. Choose wood that is safe for plants. Cedar is a good choice. It lasts a long time.
Step 4: Cut the Wood
Use your measuring tape to cut the wood. You will need:
- Four side pieces
- Four corner posts
Make sure the cuts are straight. This helps your bed stay strong.
Step 5: Assemble the Frame
Now it is time to build the frame. Follow these steps:
- Lay out the side pieces on the ground.
- Attach the corner posts to the sides.
- Use screws or nails to hold them together.
- Make sure the frame is square and level.
Check the corners with a level. This makes sure your bed is even.
Step 6: Set Up the Garden Bed
Carefully lift your frame to the chosen spot. Make sure it is level. If the ground is not level, adjust the bed. You can dig a little or add soil.
Step 7: Fill with Soil
Now it is time to fill your bed with soil. Use good quality soil. You can mix in compost for better nutrients. Fill the bed to the top, but leave a little space.
This will help when it rains. The water needs room to go.
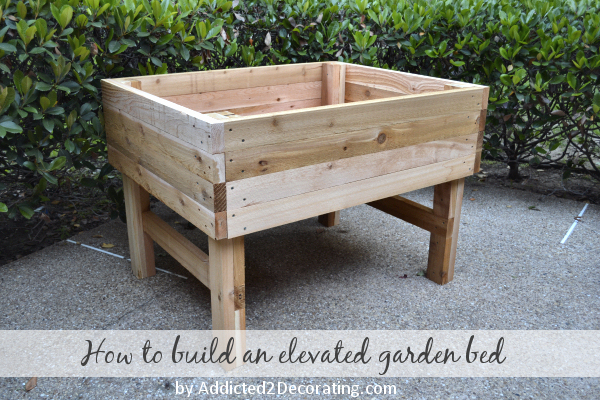
Credit: www.addicted2decorating.com
Step 8: Choose Your Plants
Now you can choose what to grow. Some easy plants are:
- Tomatoes
- Lettuce
- Carrots
- Herbs like basil or parsley
You can also grow flowers. They make your garden look nice.
Step 9: Plant Your Seeds or Seedlings
Follow the instructions on the seed packets. Some seeds need to be planted deep. Others should be just under the soil.
If you are using seedlings, dig small holes. Place the seedling in the hole and cover it with soil.
Step 10: Water Your Plants
After planting, give your plants water. Make sure the soil is moist. But do not soak it. Too much water can hurt the plants.
Check the soil every few days. Water again when it feels dry.
Step 11: Maintain Your Garden Bed
Keep an eye on your plants. Look for bugs and weeds. Pull out weeds by hand. They take food and water from your plants.
If you see bugs, try to remove them gently. You can use natural sprays if needed.
Step 12: Enjoy Your Garden
Now you can enjoy your garden! Watch your plants grow. You can pick fresh vegetables and herbs.
Gardening is a fun way to spend time outdoors. It is also good exercise.
Tips for Success
Here are some helpful tips:
- Rotate your crops each year.
- Keep a gardening journal.
- Learn about companion planting.
- Use mulch to keep moisture in.
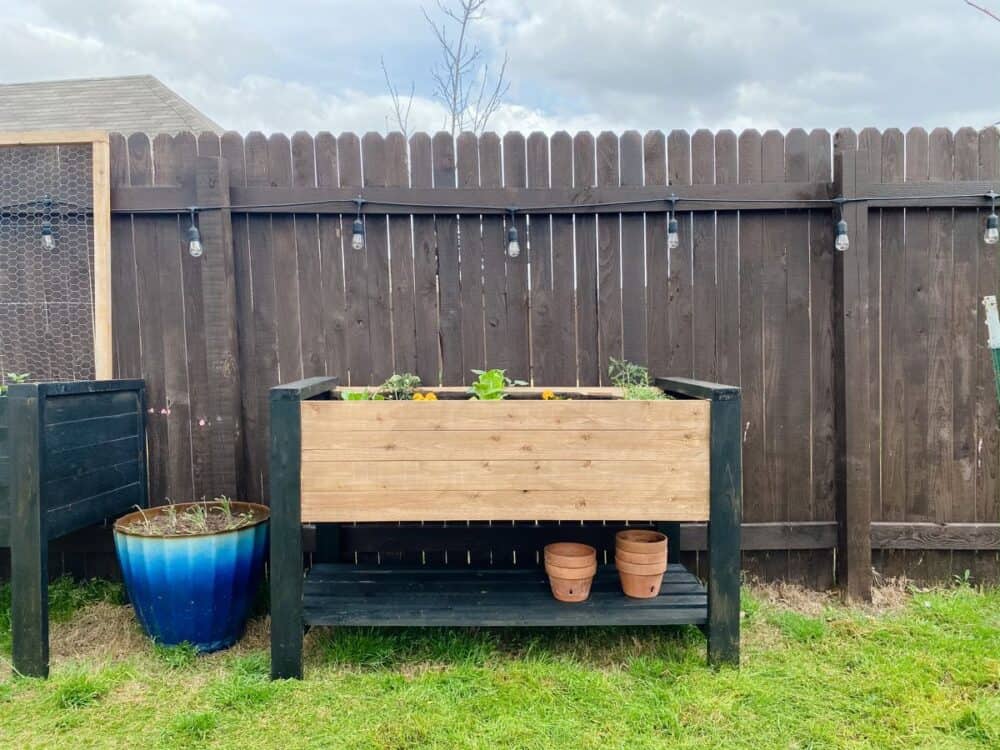
Credit: www.loveandrenovations.com
Conclusion
Building an elevated garden bed is simple. You can do it in a few steps. With the right materials and care, your garden will thrive. Enjoy the process of growing your own plants. Gardening is rewarding and fun!
