Building a raised garden bed is fun and easy. It helps grow plants better. Many people love to garden. This guide will show you how to make one. You will learn what you need and how to do it step by step.
What is a Raised Garden Bed?
A raised garden bed is a box filled with soil. It sits above the ground. You can grow flowers, vegetables, and herbs in it. The soil is usually better than in the ground. This helps plants grow strong and healthy. Raised beds make gardening easier for many people. They are easy to reach. You do not need to bend down much.
Why Build a Raised Garden Bed?
There are many reasons to build a raised garden bed:
- Better Soil: You can choose the best soil for your plants.
- More Control: You control the conditions. You can add compost and other nutrients.
- Fewer Weeds: Raised beds can have fewer weeds. This makes it easier to care for your plants.
- Good Drainage: Water drains better. This keeps roots from getting too wet.
- Easier to Access: You can reach your plants without bending.

Credit: homesteadandchill.com
Materials You Need
Before you start, gather your materials. Here’s a list:
- Wood: Use untreated wood. Cedar or pine works well.
- Screws: Use exterior wood screws to hold the bed together.
- Drill: You will need a drill to put in the screws.
- Soil: Get quality soil for your plants.
- Plants or Seeds: Choose what you want to grow.
- Tools: You may need a saw, tape measure, and level.
Steps to Build a Raised Garden Bed
Now let’s go through the steps to build your garden bed.
Step 1: Choose A Location
Pick a sunny spot in your yard. Most plants need six hours of sun each day. Make sure the area is level. This will help with water drainage.
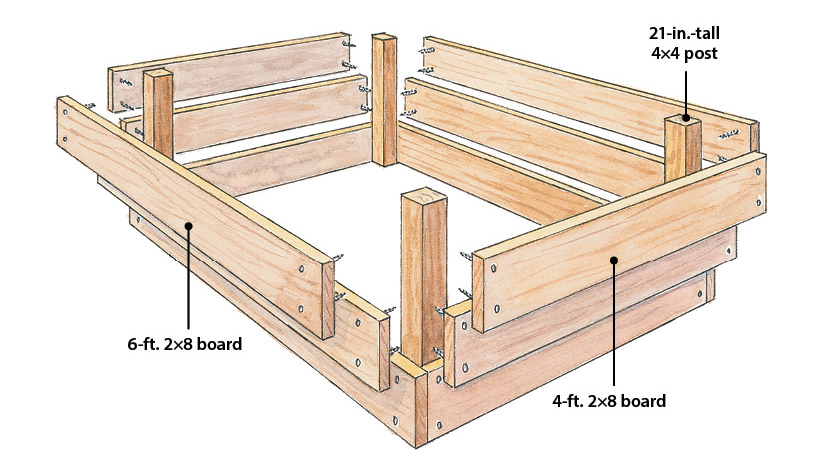
Step 2: Measure And Cut The Wood
Decide how big you want your bed. Common sizes are:
- 4 feet by 4 feet
- 4 feet by 8 feet
- 3 feet by 6 feet
Cut the wood to your chosen size. You will need four pieces for the sides.
Step 3: Assemble The Bed
Lay the wood pieces on the ground. Make a rectangle or square. Use screws to hold the corners together. Make sure it is sturdy. If needed, add extra screws in the middle.
Step 4: Prepare The Ground
Clear the area where the bed will sit. Remove grass and weeds. You can dig a little to loosen the soil. This helps the plants grow roots.
Step 5: Place The Bed
Put the assembled bed in the cleared area. Use a level to check. Make sure it is even on all sides. Adjust if needed.
Step 6: Fill With Soil
Now, fill the bed with soil. Use a mix of garden soil and compost. This mix gives nutrients to the plants. Fill it to the top, leaving some space.
Step 7: Plant Your Seeds Or Plants
Now it’s time to plant. If you have seeds, follow the package instructions. If you have plants, dig a hole and place them in. Cover the roots with soil. Water them gently.
Step 8: Care For Your Garden
After planting, care for your garden. Water regularly, especially in dry weather. Watch for weeds. Pull them out when you see them. You may also want to add mulch. Mulch helps keep moisture in the soil.
Maintenance Tips
Here are some tips to keep your raised garden bed healthy:
- Water: Water your plants deeply. This helps roots grow strong.
- Fertilize: Use organic fertilizers to feed your plants.
- Rotate Plants: Change where you plant each year. This helps soil health.
- Check for Pests: Look for bugs or damage on plants. Remove pests by hand or use safe methods.
Common Mistakes to Avoid
When building and caring for a raised garden bed, avoid these mistakes:
- Using Treated Wood: Treated wood has chemicals. These can harm plants.
- Poor Drainage: Make sure water can drain well.
- Overcrowding Plants: Give plants enough space to grow.
- Ignoring Soil Quality: Use good soil for healthy plants.
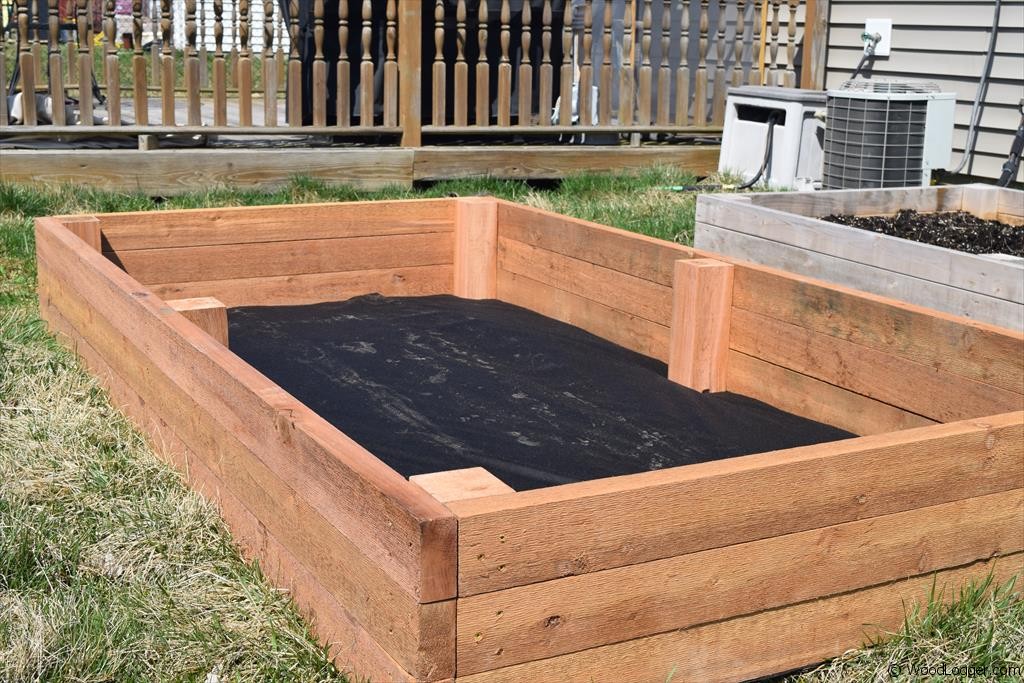
Credit: www.woodlogger.com
Conclusion
Building a raised garden bed is a great project. It helps you grow plants easily. With the right materials and steps, anyone can do it. Remember to care for your garden. Soon, you will enjoy fresh vegetables and beautiful flowers.
Now, gather your materials and start building. Happy gardening!
